
Storing and Retrieving Images From a SQL Server Table
Most applications use images of some kind, like a .jpg or .gif file. One application might only have a few images, while another application could have thousands of images. The images might only be read or written a few times, or be used frequently by an application. When an application needs to store images, you need to determine how best to store and manage your images. This article will show you how to insert and extract images from a SQL Server database as well as discuss issues related to storing your images in SQL server.
Advantages and Disadvantages of Storing Images in SQL Server
Even Microsoft does not recommend storing images in SQL Server, because this causes performance and database disk space issues. An application that stores images in a SQL Server database will experience performance problems each time an image is stored or retrieved from SQL Server because of the way SQL Server needs to store or retrieve images.
SQL Server needs to convert an image that is larger than 8K into multiple chunks, and then store these chunks on separate SQL Server pages. When SQL Server retrieves a large image stored in a database, the image must be retrieved in chunks and converted back into an image. This process of breaking up an image into chunks and reassembling these chunks back into images is what causes performance problems. Also, storing images in a database will make the database considerably larger, so backing up and restoring the database will take longer.
Knowing how often your application is going to insert, update, and select an image from a database might help you to determine how greatly performance will be degraded if you store your images in a SQL Server database. If you are only inserting the image once, and retrieving it rarely, then the performance hit will be minimal for each usage of an image. On the other hand, if your application is serving up a single image frequently, then the performance drain on SQL Server could be significant. When the performance impact is significant, it is best to just save the image natively in a file system and store only a pointer (a URL or an actual file location ) to the file in SQL server.
There are advantages to storing images in a SQL Server database, however. One advantage is that it simplifies managing the images. If you want to move your database to a different database server, it is as easy as copying the database. Another advantage of storing the images in SQL Server is the extra layer of security around the images. By storing images in SQL Server, you can manage access to images using SQL Server logins and roles. This extra layer of security makes it harder for an individual to gain access to your application images.
Using TEXTCOPY to Store and Retrieve an Image from SQL Server
SQL Server provides a binary named “TEXTCOPY” to import and export an image to and from SQL Server. This “.exe” is stored in the “…\MSSQL\Binn” directory. The following is the syntax for using this executable:
TEXTCOPY [/S [sqlserver] ] [/U [login] ] [/P [password] ]
  [/D [database] ] [/T table] [/C column] [/W"where clause"]
  [/F file] [{/I | /O}] [/K chunksize] [/Z] [/?]

  /S sqlserver       The SQL Server to connect to. If 'sqlserver' is not
                     specified, the local SQL Server is used.
  /U login           The login to connect with. If 'login' is not specified,
                     a trusted connection will be used.
  /P password        The password for 'login'. If 'password' is not
                     specified, a NULL password will be used.
  /D database        The database that contains the table with the text or
                     image data. If 'database' is not specified, the default
                     database of 'login' is used.
  /T table           The table that contains the text or image value.
  /C column          The text or image column of 'table'.
  /W "where clause"  A complete where clause (including the WHERE keyword)
                     that specifies a single row of 'table'.
  /F file            The file name.
  /I                 Copy text or image value into SQL Server from 'file'.
  /O                 Copy text or image value out of SQL Server into 'file'.
  /K chunksize       Size of the data transfer buffer in bytes. Minimum
                     value is 1024 bytes, default value is 4096 bytes.
  /Z                 Display debug information while running.
  /?                Display this usage information and exit.
You can call this executable without any parameters or a subset of parameters. When you execute the “exe,” if there are any required parameters missing, you will be prompted to enter the missing parameters. The following is an example of a command that will save an image to SQL Server, and then one that will export an image to a file system from SQL Server.
First, I first need to insert an image. The following is an image named “c:\temp\glacier.jpg” that I will be storing:

This image will be stored in a table named “Image.” The statement I used to create this Image table can be found in weblisting1. To insert the “glacier.jpg” picture into my SQL Server table, I use the following command at the DOS prompt:
C:\Program Files\Microsoft SQL Server\MSSQL\Binn\TEXTCOPY.exe" /S(local)
/Umylogin /Pmysapassword /D TEST /T Image /C Picture /F "/sql/sql_articles/larsen13/Ctempglacier.jpg"
/W"where Title='glacier'" /I
This example, when executed by the DOS command shell, copies the image “glacier.jpg” into a table “Image” into a database I created and named “TEST.” With this command, I can log on to my local SQL Server database using a SQL Server login named “mylogin.” Note that the TEXTCOPY executable does not support Windows authentication. The “/W” parameter identifies a “WHERE” clause that will identify the single record to be updated in the “Image” table. The “/W” parameter is required to start, with “where” followed by a criteria that will identify a single record. The TEXTCOPY .exe requires that a shell record be already stored in the “Image” table so that it can updated. This shell record is the record identified by the /W parameter. In this shell record, the image column “Picture” must have a non-null value. I used the following code to create the shell record prior to running the TEXTCOPY command above:
insert into Image(Picture,Title) values(0x0,'Glacier')
If there is no shell record for TEXTCOPY to update, then you will get the following error:
TEXTCOPY Version 1.0
DB-Library version 8.00.194
ERROR: Row retrieval failed.
If you have created the shell record, but the Picture column is NULL, the following error will be displayed:
TEXTCOPY Version 1.0
DB-Library version 8.00.2039
ERROR: Text or image pointer and timestamp retrieval failed.
If you are storing images in SQL Server, you will probably also need to retrieve them. TEXTCOPY can be used to create a file from an image stored in SQL Server. An example follows of how to use TEXTCOPY to retrieve the glacier picture from SQL Server and save it to a file:
"C:\Program Files\Microsoft SQL Server\MSSQL\Binn\TEXTCOPY.exe" /S(local)
/Umylogin /Pmysapassword /D TEST /T Image /C Picture /F
"/sql/sql_articles/larsen13/Ctempglacier_out.jpg" /W"where Title='glacier'" /O
The only difference between this command and the one that saved the image into SQL Server is that the “/O” option was used, instead of the “/I” option. Note that if you try to create an output file and the image doesn’t exist, the process will successfully complete, but the file will be zero bytes in length.
As you can see, the TEXTCOPY executable allows you to copy a single image to or from SQL Server. But sometimes you might want to insert or export multiple images at a time instead of just one. It is an easy task to migrate multiple images. One way to do this is to build a stored procedure that exploits the xp_cmdshell extended stored procedure. This stored procedure would perform multiple executions of TEXTCOPY, once for each image that needs to be migrated.
Using Visual Basic .NET to Migrate Images To and From SQL Server
The TEXTCOPY method works, but is not a great interface for an application. In most applications, you would want to use a method to store images that has a more robust programmable interface. Such an interface should make it easy to insert and retrieve images, and allow for error handling. One such programmable method to migrate images to and from SQL Server is to use some of the Visual Basic objects that are available in .NET.
To demonstrate how Visual Basic can write and read images from SQL Server, let me review the code for a simple Windows form called “Manage Image.” This form supports writing and reading images to and from SQL Server (the complete listing of the code for this form is found in weblisting2). Let me walk you through this simple Windows form object. But before reviewing the code, the following depict the windows that will be displayed when executing this module, and how each textbox and button is to be used.
When you initially execute the “ManageImage,” object the following form is displayed:
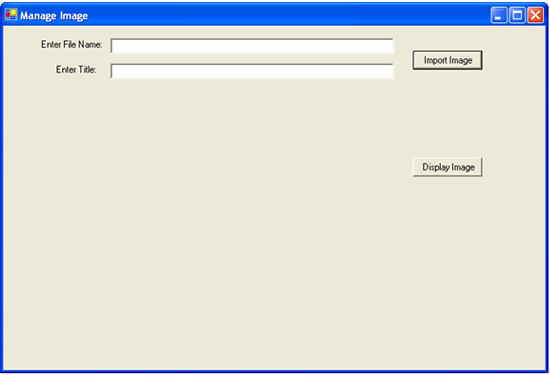
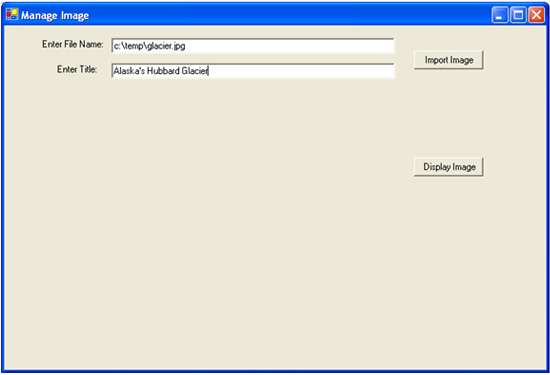
On this screen, there are two textboxes and two buttons. To insert an image into my SQL Server “Image” table, I need to identify where the image is stored and the title I wish to associated with the image. I can do this by entering the image file name in the “Enter File Name:” textbox and the title in the “EnterTitle:” text box. Next, to store my image, I click the “Import Image” button. If I wanted to insert my glacier picture into my database, I would then enter the following text and hit the “Import Image” button:
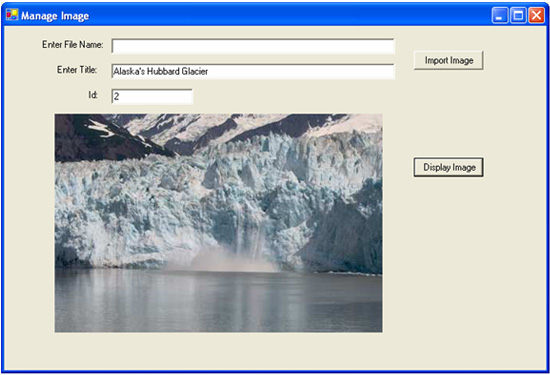
To retrieve that glacier image and display it, I would enter the title in the “Enter Title” textbox, then click the “Display Image” button. Here is a screen shot of what is displayed after retrieving the image:
Let me go through the different sections of code that make up my Windows form module. Keep in mind that this code is very basic, and doesn’t have the necessary error handling to make it a robust application. But even though this code is limited, it should give you a jumpstart on how to store and retrieve images from SQL Server. The first section, “Section A,” initializes the windows form and sets up the connection string to my TEST database. Since this section is mostly generated code by Windows form designer, I am only going to review a few lines that I added to the module at the beginning of this section. Here are the first few lines of code from “section A”:
Imports System.Data
Imports System.Data.SqlClient
Imports System.IO
Imports System.Drawing.Imaging
Public Class ManageImage
    Inherits System.Windows.Forms.Form
    Dim strCn As String = "Data Source=(Local);" & _
              "Initial Catalog=TEST;Integrated Security=SSPI"
The “Imports” statement includes the code for namespaces necessary to handle reading and writing my image to and from SQL Server, reading my image file from disk, and displaying my image on the Windows form. The string variable “strCn” defines the connections string for my database where I am storing my images. Here, I am connecting to my local SQL Server machine with Windows Authentication and using the database named “TEST.”
The following code in “Section B” inserts my image into my database:
    Private Sub Button1_Click(ByVal sender As System.Object, ByVal e As
System.EventArgs) Handles Button1.Click
        TextBox3.Visible = False
        Label3.Visible = False
        Dim cn As New SqlConnection(strCn)
        Dim cmd As New SqlCommand("INSERT INTO Image (Picture,Title) " & _
            "VALUES (@Picture, @Title)", cn)
        Dim strImageFilePath As String = _
            TextBox1.Text
        Dim fsImageFile As New FileStream(strImageFilePath, _
            FileMode.Open, FileAccess.Read)
        Dim bytImageData(fsImageFile.Length() - 1) As Byte
        fsImageFile.Read(bytImageData, 0, bytImageData.Length)
        fsImageFile.Close()
        Dim picture As New SqlParameter("@Picture", SqlDbType.Image, _
            bytImageData.Length, ParameterDirection.Input, False, _
            0, 0, Nothing, DataRowVersion.Current, bytImageData)
        Dim Title As New SqlParameter("@Title", SqlDbType.VarChar, _
            250, ParameterDirection.Input, False, _
           0, 0, Nothing, DataRowVersion.Current, TextBox2.Text)
        cmd.Parameters.Add(picture)
        cmd.Parameters.Add(Title)
        cn.Open()
        cmd.ExecuteNonQuery()
        cn.Close()
        TextBox3.Visible = True
        Label3.Visible = False
        TextBox3.Text = "Image inserted"
        TextBox1.Text = Nothing
        PictureBox1.Image = Nothing
    End Sub
This section of code is executed when you click on the “Import Image” button. The first two “Dim” statements establish a connection to SQL Server and builds a T-SQL INSERT statement. The INSERT statement contains two parameters, @Picture, and @Title. These parameters will be replaced later on in the code. To get the image from the specified file location into a byte data type variable (bytImangeData) the “Read” method of the “FileStream” class is used. By using the “SqlParamater” class and the “Parameters” collection “Add” method, the @Picture and @Title parameters in the INSERT statement are replaced with the image from the file specified in Textbox1 (“Enter File Name:”), and the title entered in TextBox2 (“Enter Title:”). The “ExecuteNonQuery” method submits the INSERT statement to SQL Server.
Now that you know how to insert an image into a SQL Server table, let me review the section of code that retrieves the image. The code below reads an image from SQL Server and displays it on a form:
Private Sub Button2_Click(ByVal sender As System.Object,
ByVal e As System.EventArgs) Handles Button2.Click
        Dim cn As New SqlConnection(strCn)
        Dim cmd As New SqlCommand("SELECT top 1 Id, " & _
            "Picture FROM Image where Title = '" & _
            Replace(TextBox2.Text, "'", "''") & "'", cn)
        PictureBox1.Image = Nothing
        Dim da As New SqlDataAdapter(cmd)
        Dim ds As New DataSet
        da.Fill(ds, "Image")
        Dim RowCount As Integer =
ds.Tables("Image").Rows.Count
        If RowCount > 0 Then
            Dim bytImageData() As Byte = _
                ds.Tables("Image").Rows(0)("Picture")
            Dim stmImageData As New
MemoryStream(bytImageData)
            PictureBox1.Image =
Image.FromStream(stmImageData)
            TextBox3.Text =
ds.Tables("Image").Rows(0)("Id")
            TextBox3.Visible = True
            Label3.Visible = True

        End If

    End Sub
The first few lines of this code establish a connection variable and then declare the T-SQL command to return my image. The image that is returned is determined by the title entered in Textbox2. The SELECT statement will return the first image in my “Image” table that matches the title entered. The SqlDataAdapter class (da), in conjunction with the DataSet (ds) class, use the Fill method to populate the dataset “ds.” The code checks to make sure a record is returned; if the RowCount variable is greater than 0, a record has been returned and the image is displayed. The image is placed into a byte array variable using the MemoryStream class, then the FromStream method is used to populate PictureBox1.Image on my Windows form. The “Id” column value is placed in TextBox3, and TextBox3 is made visible.
As you can see, it is fairly easy to populate and return an image to an application using Visual Basic .NET. Using the constructs of .NET makes it much easier for a programmer to write code to manage the images for an application.
Conclusion
In this article, I have shown you two different methods you can use to store and retrieve images from SQL Server. The TEXTCOPY method uses a DOS command shell executable to store and retrieve images, whereas the Visual Basic .NET method uses the .NET objects to programmatically retrieve and store images in SQL Server. Before you decided to use either of these methods to store images in your database, you need to consider whether you can live with the performance impact associated with storing images in SQL Server. And next time you need to store an image in SQL Server, I hope that one of these methods will provide you with the basic tools needed to store and retrieve your images.
--
Gregory A. Larsen is a DBA at Washington State Department of Health. He has been working with computers since the late 1970s, and has a BS in Computer Science, with a minor area of study in Mathematics. During Greg’s DBA career, he has managed databases on Windows, UNIX, and IBM mainframes; before becoming a DBA, he developed and maintained applications. Greg has written a number of articles for different web publishing sites, as well as SQL Server Magazine. Greg also maintains a Web site that contains a number of SQL Server examples to common DBA and SQL developer issues.
Contributors : Gregory A. Larsen
Last modified 2006-04-21 05:25 PM