
Enhancing Rollback by Using Virtual Machines
Every DBA and every database developer has been saved by transactional rollback at some point. Maybe it was a DELETE statement without a WHERE clause or an incorrectly specified WHERE clause. As good as the ROLLBACK statement is, though, sometimes it just isn’t enough, and restoring a database from a backup still isn’t always enough. Resolving some problems may even require rebuilding an entire machine. Virtual machines offer the thoroughness of a complete rebuild with the ease of a ROLLBACK statement.
Virtual machines are ideal for testing deployments or configuration change scripts. Sometimes no matter how much planning is done, perfecting a deployment script might require iterative testing and refinement. If a test of a script doesn’t go well, the changes to the virtual machine can simply be undone, causing the virtual machine to revert to a pristine state. Modify the script, try again, and — depending on the outcome — either keep or undo the changes to the virtual machine.
Beta software presents a truly compelling reason to use virtual machines. It’s really not a good idea to install beta software on a machine unless the machine is dedicated to only running the beta software. Many DBAs and developers want to experiment with SQL Server 2005 (formerly Yukon) and Visual Studio 2005 (formerly Whidbey). By installing these beta products in a virtual machine, the host machine is completely unaffected by beta software. What goes on in the virtual machine stays in the virtual machine.
Many companies are virtualizing older computers running legacy applications; it’s increasingly common to see old NT4 servers running SQL Server 6.x moved to virtual machines. Multiple old physical servers can be replaced by one server running multiple virtual machines (there are commercial products from Leostream, PlateSpin, and VMware to facilitate physical to virtual conversion).
Microsoft and VMware offer virtual machine products. Microsoft’s Virtual PC 2004 product is included in MSDN software subscriptions. Microsoft’s Virtual Server product is currently still in beta. A free trial version of Virtual PC 2004 can be downloaded from here. The official host system requirements for Virtual PC 2004 are found here and do not include Windows Server 2003. But many people (including me) are experiencing great success running Virtual PC 2004 on a host Windows Server 2003 system. Using such an unsupported configuration is completely at your own risk and should never be done with production software and systems.
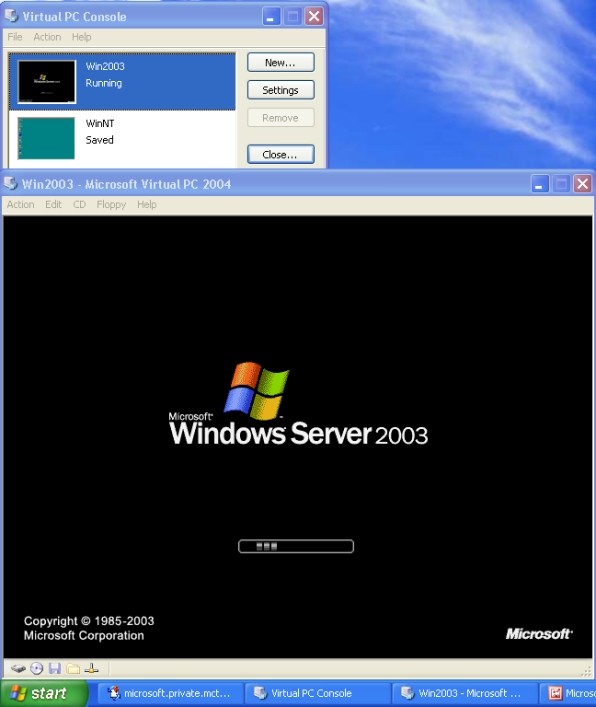
As the following screen capture illustrates, a desktop OS such as Windows XP can be used to host a server OS such as Windows 2003 Server.
Virtual PC 2004 Service Pack 1
Since this article originally appeared, Virtual PC 2004 Service Pack 1 was released. We’ve updated the article to reflect the improvements offer by Service Pack 1, which you can download from here. Service Pack 1 offers improved reliability, new Virtual Machine Additions and better compatibility with Windows Server 2003 as the host operating system. Perhaps the most important new feature of Service Pack 1 is the Virtual Disk Compacter, which provides easy and effective virtual hard disk (vhd) compaction. Virtual machines made with the previous version (original Virtual PC 2004 without Service Pack 1) of Virtual Machine Additions will continue to run, but for best performance, you should upgrade them to the Service Pack 1 version of Virtual Machine Additions.
Creating a Virtual Machine Using VPC 2004
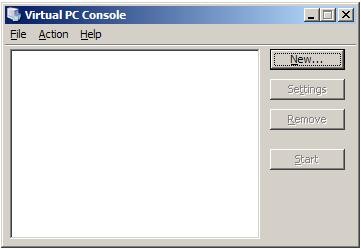
Virtual PC 2004 offers several virtual machine creation options. In the example that follows, the virtual machine resides completely on the host machine. Begin by going to Start | All Programs | Microsoft Virtual PC. When the Virtual PC Console appears, click New.
The New Virtual Machine Wizard appears.
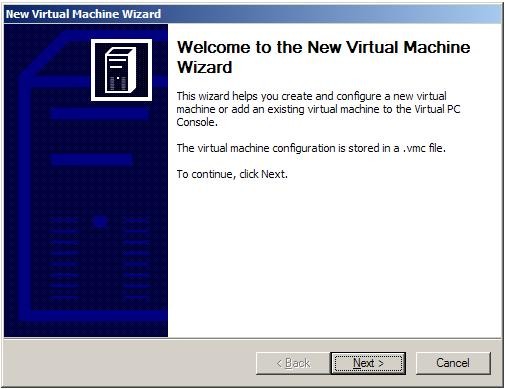
Click Next to continue.
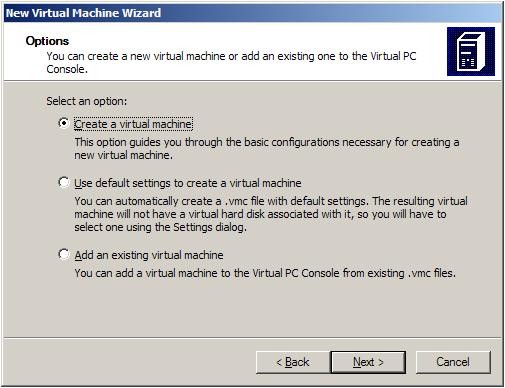
Accept the default of Create a virtual machine and click Next.
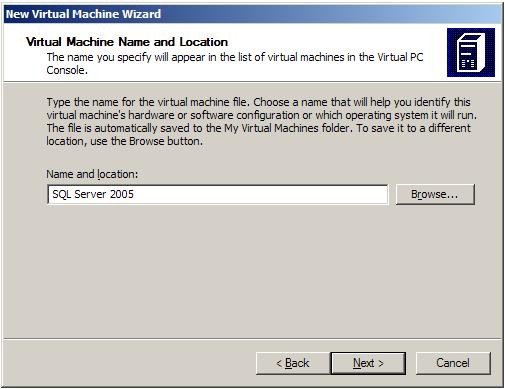
Enter a name for your virtual machine and click Next.
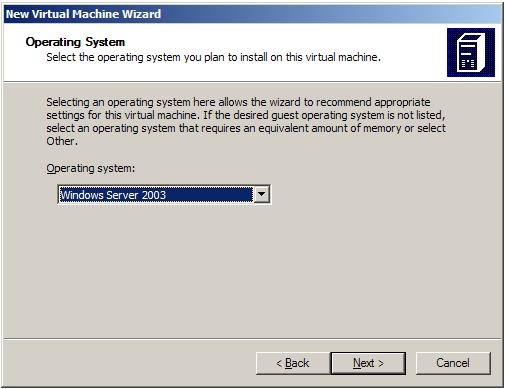
Select a guest operating system. Although Windows Server 2003 is listed in the dropdown list, it is not officially supported as a guest OS, even though it works just fine. The list of officially supported OS guests is found here. Click Next to continue.
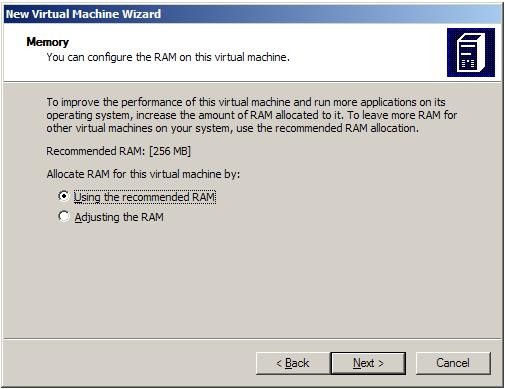
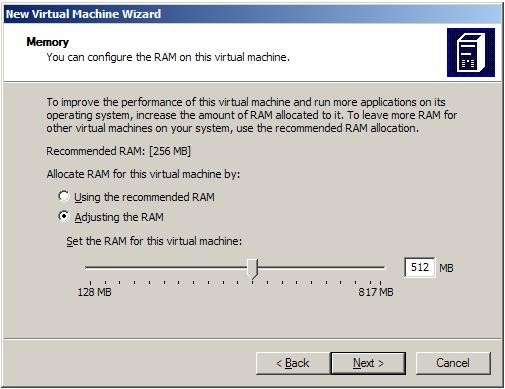
The more RAM you can allocate to a virtual machine, the better, but you do need to leave enough RAM available to the host machine. Don’t worry about choosing the wrong amount of RAM when running the wizard; you can change the amount allocated to the virtual machine after it is created and it is turned off. When running only one virtual machine, I allocate half of the machine’s RAM to the virtual machine, leaving the other half of the RAM for the host.
Click Next to continue. The default is to use an existing virtual hard disk, which is not what is desired in this example.
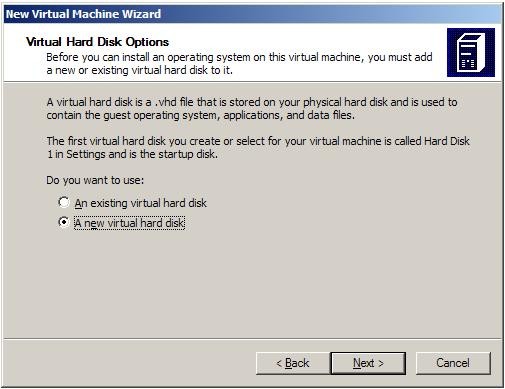
Select A new virtual hard disk and click Next.
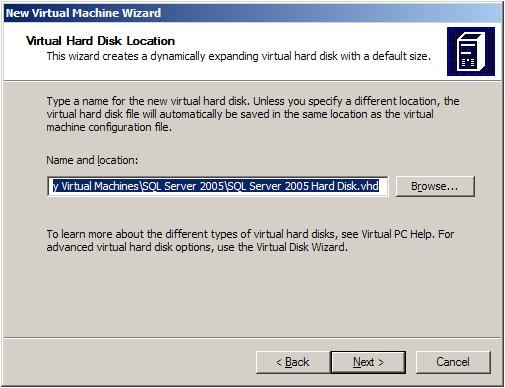
You can specify a different location for the virtual hard disk file (VHD). Bear in mind that everything in the virtual machine is in the VHD file, so VHD files are typically measured in gigabytes. Click Next to continue.
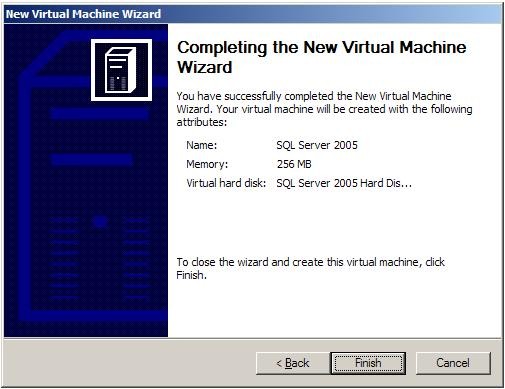
Click Finish to continue to complete the wizard. The next step is to return to the Virtual PC Console.
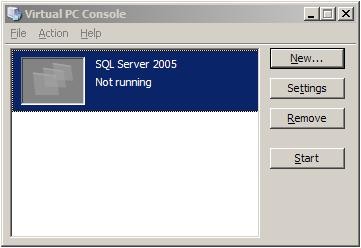
Be sure your new virtual machine is selected and then click Start. The virtual machine will attempt to boot. Since an operating system hasn’t been installed yet, it should then attempt to boot from the bootable operating system CD. But the CD or DVD drive (or iso image file) hasn’t yet been attached to the virtual machine, so it can’t boot from the CD. As soon as the virtual machine window appears, go to the menu bar, select CD, and then select the physical CD or DVD drive or select an iso image file on the host machine or network.
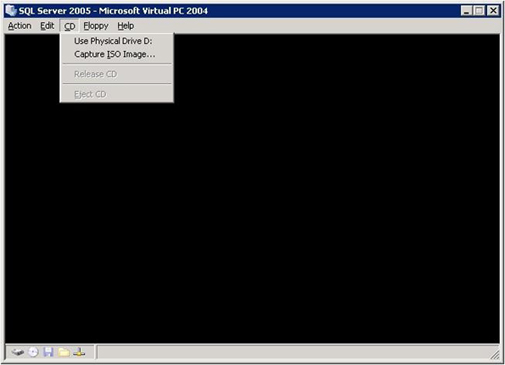
If an operating system iso image file is available on the host machine (e.g., local disk or mapped drive), it will provide a faster installation than an operating system CD or DVD. At this point, installing the operating system is just like it is on a physical machine.
Using a VPC 2004 Virtual Machine
Logging into a virtual machine is slightly different. CTRL+ALT+DEL is processed by the host machine only and not processed by the virtual machine. Use the right ALT key (known as the host key) with the DEL key to pass the equivalent of a CTRL+ALT+DEL to the virtual machine. You can also pass a CTRL+ALT+DEL by going to the menu bar of the virtual machine’s window as shown below.
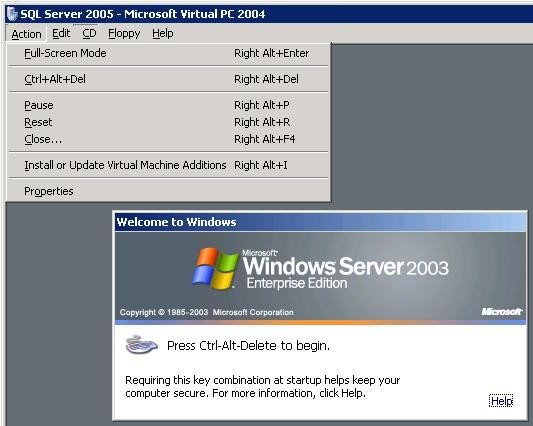
Also notice the option to Install or Update Virtual Machine Additions shown above. Use this option after logging in to the virtual machine the first time; it installs performance enhancing optimizations for the guest OS. These additions also allow you to resize your virtual machine’s window and more importantly, prevent the mouse cursor from being trapped in the virtual machine’s window. Without the machine additions, you must press the right ALT key to release the mouse from the virtual machine’s window. If you are creating a new virtual machine under a installation of Virtual PC 2004 that has been upgraded to Service Pack 1, the virtual machine will get the latest version of the virtual machine additions.
Once you’ve upgraded your Virtual PC 2004 with Service Pack 1, you’ll need to use the Install or Update Virtual Machine Additions option to upgrade each of your virtual machines made before Service Pack 1 to the latest version of the Virtual Machine Additions.
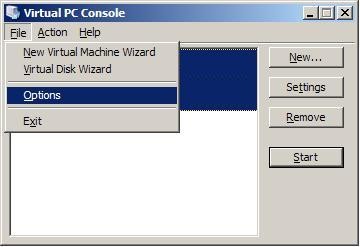
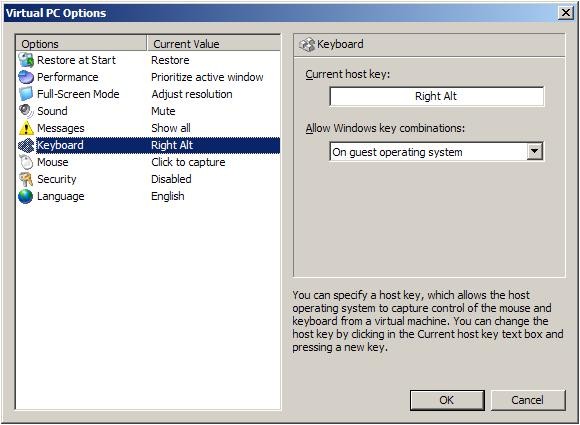
If you’d like to place your virtual machine in full-screen mode, use the right ALT key with the Enter key. When in full-screen mode, nothing on the host is visible, so you should use right ALT+Enter to toggle back to the host. The host key is configurable in the Virtual PC Console.
Rollback
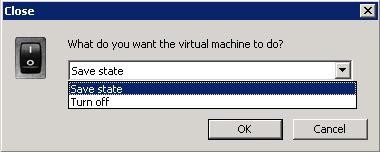
By default, Virtual PC provides two options when closing the virtual machine, Save state and Turn off. Save state corresponds to Hibernate on a laptop, and Turn off corresponds to pulling the plug on a desktop or turning off the master power switch.
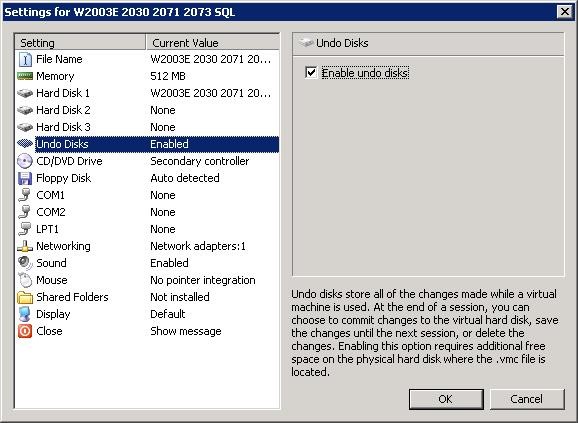
These options work very well, but can be enhanced by using the Undo Disks feature. Go to the Settings for the virtual machine and check the checkbox for Enable undo disks as shown below.
With undo disks enabled, the Close dialog appears as follows:

Save state and save changes without the Commit changes to the virtual hard disk checkbox checked is a good choice if you’re not sure if you should keep or discard your changes. If you’re confident that you want the changes you’ve made, Save state and save changes with the Commit changes to the virtual hard disk checkbox checked is analogous to committing a transaction in SQL Server. If you need to back out all of your changes, select Turn off and delete changes, which is analogous to rollback in SQL Server.
Boosting Performance
Virtual machines put a load on the processor, RAM, and hard drives, and with more virtual machines running simultaneously, more RAM is needed. Putting the virtual machine files on a 7200 rpm second disk is a good idea. If an external hard drive is used for storing the virtual machine files, many people have reported that Firewire provides better performance than USB 2.0. Even though the rated transfer rate for USB 2.0 is about 20 percent faster than Firewire, USB puts a greater load on the processor. Consequently, Firewire provides better overall performance.
The Virtual PC Console has a Virtual Disk Wizard on the File menu that can be used to compact a vhd. Defragment the virtual machine before running the compation feature in the Virtual Disk Wizard. Another alternative for compacting a vhd is described in the next section.
Be sure to disable unnecessary services (e.g., Messenger service) in the virtual machine. If the guest OS is XP, turn off System Restore. It needlessly uses up virtual disk space. After all, you are running a virtual machine and you can undo the entire machine! You don’t need System Restore in a virtual machine equipped with undo disks.
Also, as previously mentioned, install the virtual machine additions to maximize guest OS performance.
Compacting a Virtual Hard Disk Using Image Copying Software
As pointed out in the Microsoft TechNet Webcast on troubleshooting Virtual PC, imaging software provides the greatest possible compaction of a vhd. A transcript of the Webcast is available here.
The steps for using image copying software to compact a virtual hard disk are as follows:
- Start the virtual machine. Defragment the virtual machine. Sometimes a second defragmentation will improve the amount of defragmentation.
- Close the virtual machine. It must not be in a saved state.
- Go to the Virtual PC console and use the Virtual Disk Wizard to create a new virtual hard disk (vhd).
- Using the Virtual PC console, click the Settings button for the virtual machine.
- Add the new, empty virtual hard disk to the virtual machine.
- Start the virtual machine and attach boot media quickly so that the virtual machine boots from the boot media. The best approach is to make a bootable iso file from a boot floppy or boot CD and then attach the iso file. Ideally, you want boot media that includes imaging software.
- Once the virtual machine is booted from the boot media, use image copying software to make a disk to disk image copy from the bloated vhd to the new, empty vhd.
- When the image copy is done, close the virtual machine while saving the changes.
Return to the settings for the virtual machine and detach the new vhd. - Go to the file system and delete the original, bloated vhd.
- Rename the new vhd to the name of the original vhd. (Suggestion: Use Windows Explorer. Start by right clicking the original vhd and selecting Rename. Do a control-C to copy the file name into your paste buffer. Delete the original vhd. Right click the new vhd, select Rename, and then use control-V to change its name to the name of the original vhd.)
- Start the virtual machine. If your guest OS is a Windows OS, it will detect a hardware change (new virtual hard drive) and you’ll have to reboot your virtual machine. After the reboot, you can shutdown and save your virtual machine.
You can use this procedure while undo disks are enabled, but it is faster if undo disks are disabled. If you do not use undo disks but wish to be able to recover from a failure, make a copy of your virtual machine’s entire folder before starting this process.
Physical to Virtual Conversion
Sometimes you’d like to have a copy of a particular machine for testing or diagnostic purposes. As I have mentioned, there are commercial products that automate the physical to virtual (P2V) conversion process and provide additional added value. P2V can also be done manually by doing the following steps:
- Use imaging software such as Acronis True Image or Symantec’s Ghost or Drive Image to make an image copy of the physical machine to be virtualized. Save the image copy to a network share.
- Create a new virtual machine and boot it with a boot CD or boot floppy. Use the imaging software to restore the image copy into the virtual machine.
- After imaging into the virtual machine, reboot the virtual machine to boot the new virtual machine.
- If the operating system is Windows, you will almost certainly have to replace the hardware abstraction layer (HAL) and ntoskrnl files. I used the following steps to virtualize a Windows 2003 Server:
- Inserted the Windows 2003 Server installation disk into the CD-ROM drive.
- Rebooted into the recovery console and entered the following two commands:
- expand d:\...\i386\hal.dl_ c:\windows\system32\hal.dll
- expand d:\...\i386\ntoskrnl.ex_ c:\windows\system32\ntoskrnl.exe
- Rebooted normally.
- The initial startup of a Windows machine virtualized in this manner is very slow because of all of the plug and play activity that takes place while Windows adapts to the new virtual environment.
- Keep in mind that a machine (either physical or virtual) made from an image copy has the same SID as the original. Use sysprep to generate a new SID.
The manual process described above is not appropriate for production systems. A side benefit of a P2V conversion using imaging software is compaction of the final vhd. In one test, a 13 gb physical machine ended up as a 6.5 gb virtual machine.
Virtual to Physical Conversion
You can use imaging software to do a virtual to physical conversion, although you are proceeding at your own risk in this unsupported operation. This is a bit tricky because of hardware issues. Deploying a virtual machine image to a physical machine involve the same issues as image copying from one physical machine to another physical machine with different hardware. The most likely place for problems to occur is during the initial bootup. When a machine boots, it accesses the hard drive long before Plug and Play begins. It is absolutely necessary that the necessary mass storage device driver be present. To be successful doing a virtual to physical conversion, you must use sysprep –bmsd. You need to read the documentation for sysprep 2.0 to fully understand all of the required sysprep steps for working with mass storage device drivers.
The basic Virtual PC steps for a virtual to physical conversion are:
- Start the virtual machine and login.
- Deinstall the Virtual Machine Additions.
- Run sysprep using shutdown option and the sysprep.inf file from the sysprep –bmsd step. (Refer to the sysprep 2.0 documentation for more information.)
- When the virtual machine shuts down, close the virtual machine.
- Start the virtual machine using a boot floppy or boot CD.
- Use image copying software to image copy the virtual hard disk to a physical disk.
- Close the virtual machine when the image copy completes.
- Use the image copying software to transfer the image copy to the target physical machine.
The manual process described above is not appropriate for production systems.
Differencing Disks
Differencing disks allows more efficient use of disk space and improved performance. We know that VHD files are measured in gigabytes; instead of having one VHD for Windows 2003 Server with SQL Server 2000 and another for Windows 2003 Server with SQL Server 2005, here is a high level overview on how to use differencing disks to save space:
- Create a Windows 2003 Server virtual machine.
- Create a new virtual machine using the Windows 2003 Server VHD as a base image.
- Install SQL 2000 into the new virtual machine.
- Create another new virtual machine using the Windows 2003 Server VHD as a base image.
- Install SQL 2005 into the new virtual machine.
- The base Windows 2003 Server image does not contain either of the SQL Server installations.
- Each SQL Server installation is spread over two files, one containing Windows 2003 Server, and the other containing SQL Server.
- The base VHD image can be on a network drive.
- The base vhd image must not be changed or it will break the differencing disks.
- The base vhd should be made readonly to prevent changes
Refer to the Virtual PC documentation for detailed information on creating differencing disks. VMware offers a similar functionality.
General Tips
- Do not use NTFS or zip compression on files inside a virtual machine.
- Have a large paging file inside the virtual machine.
- Add ram to the host.
- To save disk space on the host, use a dynamically expanding virtual hard disk.
- Because a dynamically expanding virtual hard disk can’t be made larger, specify the maximum size allowed when creating it.
- Exclude Virtual PC files (including Virtual PC.exe) from virus scanning software.
- Use the Virtual PC console to configure Virtual PC to run at maximum speed.
- Use iso files instead of physical CD/DVDs for installing programs.
- Some people report better Virtual PC performance if the vhd files on the host machines are compressed using NTFS compression. In my tests, this has not always been true. The results are hardware dependent. If you are using a 4200 rpm hard drive on a laptop equipped with a fast processor, NTFS compression may help. If you are using a 7200 rpm SATA hard drive on a desktop with an 800 MHz bus, NTFS compression might not help. The theory behind using NTFS compression to improve vhd performance is that disk i/o is inherently slow, so the fewer bytes read from disk, the better. If performance is good, don’t bother. If performance is not good, or you are running out of disk space, try NTFS compression and see if it helps.
Troubleshooting
The following error message was observed on more than one machine.
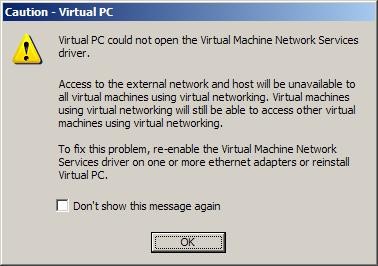
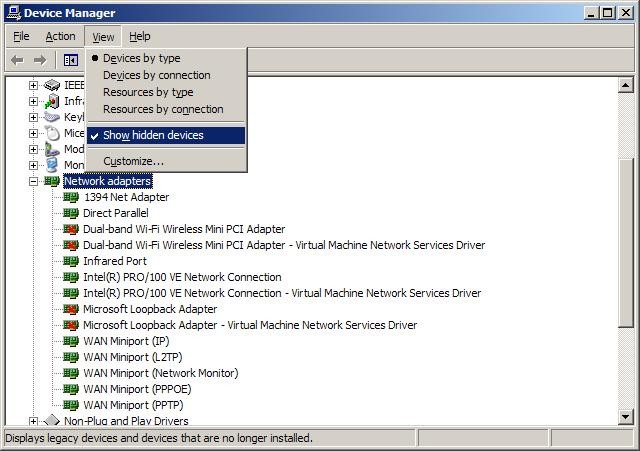
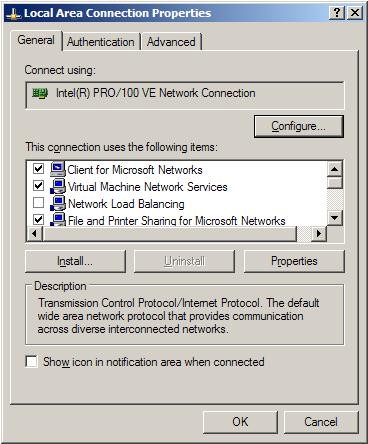
Knowledge Base article 835352 provides relevant additional information. You can easily determine if the Virtual Machine Network Services driver is installed on a network adapter by using the Device Manager. Be sure to specify Show hidden devices as shown below.
To enable the driver for a network adapter, go to the network adapter’s property and make sure that Virtual Machine Network Services is checked as shown below.
Further Reading
Conclusion
As you have seen, establishing a virtual machine environment is easy to do. Virtual machines provide rollback capability at the machine level and are ideal for testing deployments and beta software. In a future article, a virtual SQL Server cluster server will be created.
--
John Paul Cook is a database and systems architect in Houston, Texas. His primary focus is helping large enterprise customers succeed with Sarbanes-Oxley compliance, SQL Server, C#, Oracle, and the .NET framework.
Contributors : John Paul Cook
Last modified 2005-05-19 12:56 PM