
Avoiding a Common Error When Creating OLE DB User-Defined Functions (UDFs) with the Development Center
If you are a developer and haven’t had a chance to check out the new Development Center in the IBM® DB2® Universal Database™ for Multiplatforms (herein referred to as DB2 UDB) Version 8 release) what are you waiting for? This DB2 integrated development environment (IDE) is the single biggest improvement for DB2 developers to truly enable a rapid application development (RAD) environment for DB2 UDB business logic.
The Development Center can be run as stand-alone integrated development environment or added into your favorite development package. For example, Java™ developers can plug the Development Center into the IBM®WebSphere® Studio Application Developer IDE, and users of Microsoft® products can plug it into Visual Studio (and soon, Visual Studio.Net). It doesn't’t matter what application development methodology you subscribe to, the Development Center will provide a RAD experience for DB2 business logic without the need to leave your host IDE — even for debugging or connection string generation.
One of the features that the Development Center provides is the ability to create a user-defined function (UDF) that can access OLE DB data sources. This article will take you through a scenario in which a UDF is built to populate a DB2 table from the Customer table in the Northwind database that is shipped as part of Microsoft Access. This article will also point out the most common problem that people encounter when trying to create this type of UDF. (By the way, don’t test any connections or view sample data; it will all make sense in the end.)
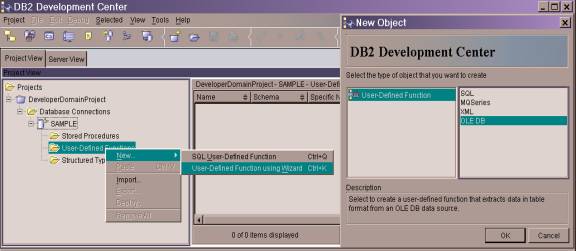
Assuming you already have a project created, right-click User Defined Functions under the database icon where you want to create the UDF, select New, and then User-Defined Function using Wizard. The New Object window opens, as shown below. Select OLE DB and click OK.
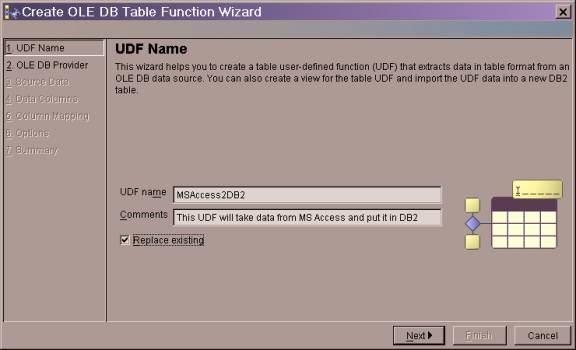
There are seven steps in the Create OLE DB Table Function Wizard. You first need to name the UDF that you want to create, and optionally add any comments to describe it, as shown below. You can also select the Replace existing check box if you want to overwrite a UDF that may have been previously created with the same name. When you are finished, click Next.
The next step is to build a connection string to the OLE DB data provider. This is where the Development Center can really deliver value to other IDEs (such as Visual Basic) since developers can build connection strings without leaving their host IDE.
Click Build Connection String. The Build OLE DB Provider Connection String Wizard opens, as shown below.
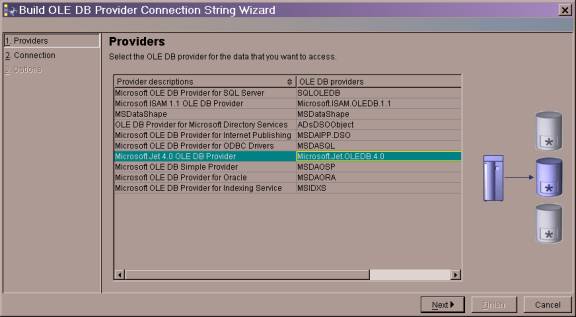
This wizard presents a list of available OLE DB providers that are installed on your system. The Northwind database is a sample database that ships with both Microsoft Access and Microsoft SQL Server. The database engine that powers Microsoft Access is actually the Microsoft JET engine; therefore, you need to select the appropriate driver (as shown above) for this database, and click Next .
In the Connection section, select the location of the OLE DB data source that you are trying to connect to. By default, the Northwind database is installed in the C:\Program Files\Microsoft Office\Office\Samples directory. Use the … button to locate the main database file (.mdb) for the Northwind database.
As long as you are logged on to DB2 as a user with the correct authority, leave the Use your current user ID and password check box selected (which is the default selection), and click Next.
The Options page (not shown) gives you a chance to specify some specific OLE DB options with the JET OLE DB provider. Let’s assume the defaults and click Finish.
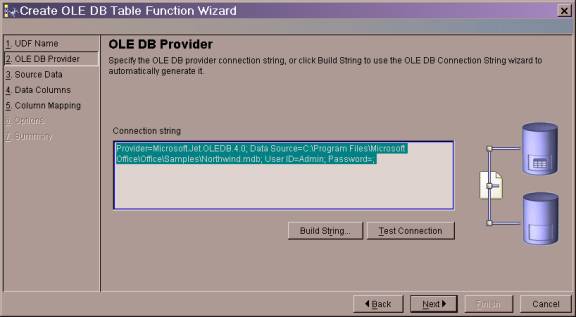
Now you have a connection string, shown below, that was built by pointing and clicking to the target OLE DB data source, as shown below. Click Next.
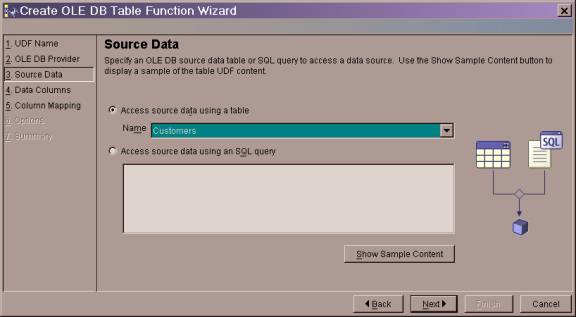
After you have selected the appropriate OLE DB provider, and built a connection string, you need to identify the source data that the UDF will draw from to populate the new DB2 table. In our example, we want to populate a new DB2 table with the data in the Customer table in the Northwind database. To do this, select the Access source data using a table radio button, and from the Name drop-down list, select the Customers table.
Of course, you can select any table that you want. You can write a SQL statement to select data from a particular table by selecting the Access source data using an SQL query radio button.
When your Source Data page looks similar to the following graphic, click on Next.
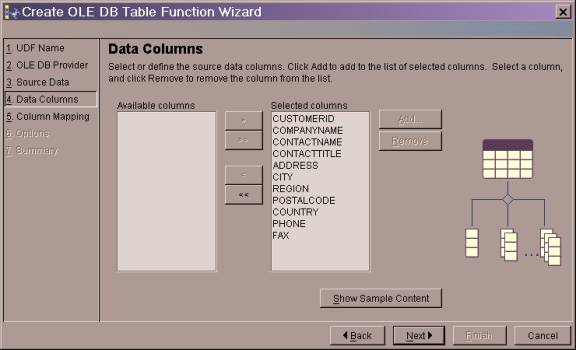
The Data Columns page allows you to select what columns from the base OLE DB table you want to have in the new DB2 table. By default, all of the columns in the base table are selected for the target table. Let’s keep it that way. Click Next.
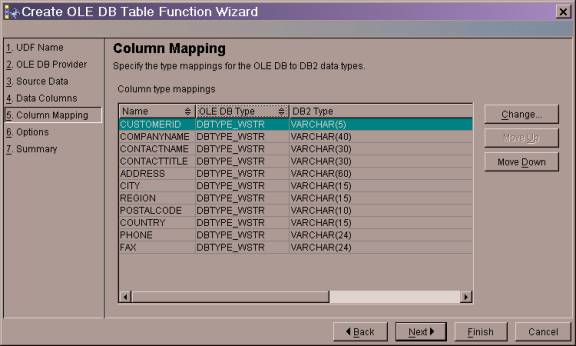
The Column Mapping page gives you an opportunity to change the data type mapping of the columns in the OLE DB source database and specify how they will be created in the target DB2 table. For example, you may want to map the OLE DB data type DBTYPE_WSTR to a CHAR data type in DB2 (the default would be to map this OLE DB data type to a VARCHAR DB2 data type). Let’s stick with the defaults, and click Next.
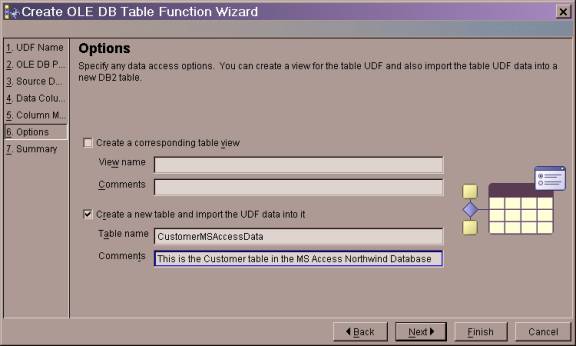
The Options page, shown below, gives you the ability to optionally create a view or table for the data you are retrieving from the OLE DB data source.
If you create a corresponding table view, DB2 will create a view over the UDF. This will allow you to access the OLE DB data source directly using SQL from a DB2 application. This is transparent to the application — it thinks it is a DB2 table. Accessing the OLE DB data source using this method can come with a performance penalty since you have to go through an extra layer (the OLE DB provider) for each data request.
For our example, let’s create a DB2 table and import data into it. You can do this by selecting the Create a new table and import UDF data into it check box. This option will create a DB2 table with all the characteristics of the data source referenced by the UDF.
Enter a name and optional comment for the table you want to create, and click Next.
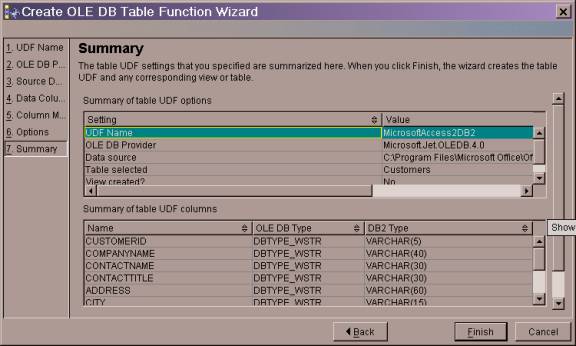
You are presented with a Summary page that summarizes all of the names and options you have selected for your UDF. Click Finish.
What happened? Chances are, you received the following error:
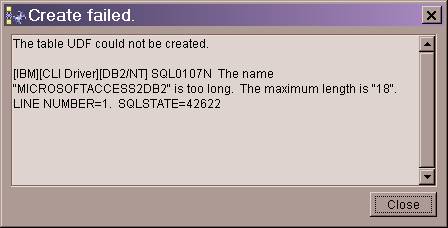
Why did this problem happen? Underneath the covers, DB2 takes this UDF and turns it into a C program. The C programming language can often hiccup over directory paths that contain spaces; for example, the Program Files or Microsoft Office directories in the default path for Microsoft Access. This seems like such a little thing, but nips a lot of people, and had me for awhile.
The solution? Simple! Move the OLE DB data source (or map it) to a directory path that does not contain spaces. For example, I copied the Northwind databases files to my d:\temp drive.
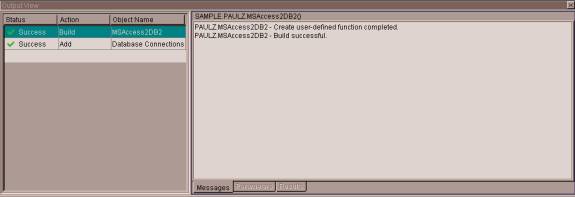
Now go back and (just to be sage) go through the whole process again, only this time select the OLE DB data source after it has been moved to a directory that does not contain spaces in its path. When you successfully build the UDF, you will receive a Build Success message in the message windows of the Development Center, as shown below.
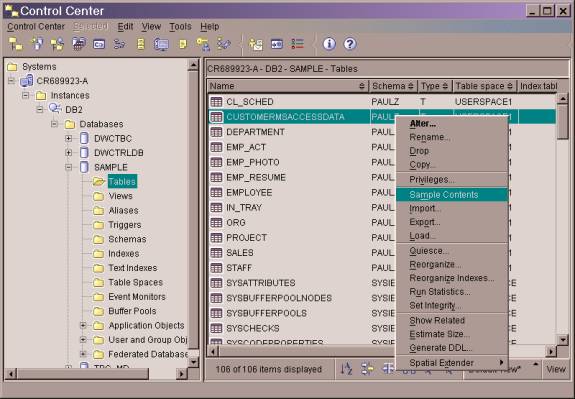
You can launch the Control Center from the Development Center toolbar. Start the Control Center, select the DB2 database that you connected to when setting up your project file, and look for your new table.
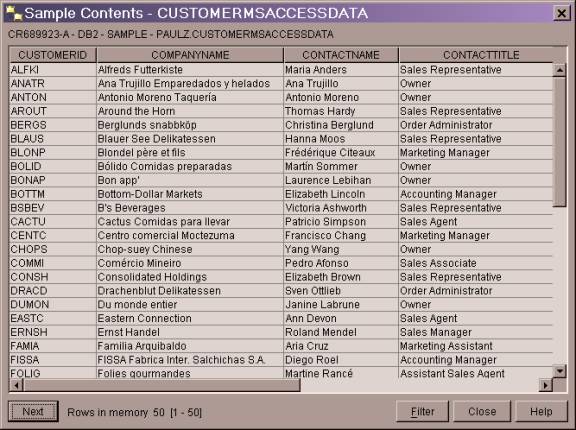
You can look at the contents of this table quickly by selecting the table, right-clicking it, and selecting Sample Contents.
Your output should look similar to this:
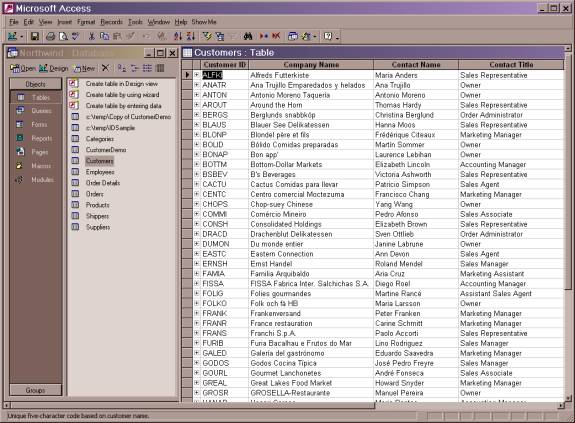
Now, compare this to the Customer table view in Microsoft Access.
So there you have it, a quick and easy way to get data from an OLE DB source into a DB2 table and the solution to the most common problem you may run into when doing so.
Trademarks
IBM, MQSeries, and WebSphere are trademarks or registered trademarks of International Business Machines Corporation in the United States, other countries, or both.
Java and all Java-based trademarks are trademarks of Sun Microsystems, Inc. in the United States, other countries, or both.
Microsoft and Windows are registered trademarks of Microsoft Corporation in the United States, other countries, or both.
Other company, product and service names may be trademarks or service marks of others.
Paul C. Zikopoulos, BA, MBA, is an IDUG keynote & award-winning speaker with the IBM Global Sales Support team. He has more than seven years of experience with DB2 and has written numerous magazine articles and books about it. Paul has written articles on DB2 for many magazines and has co-authored the books: DB2 - The Complete Reference, DB2 Fundamentals Certification for Dummies, DB2 For Dummies, and A DBA's Guide to Databases on Linux. Paul is a DB2 Certified Advanced Technical Expert (DRDA and Cluster/EEE) and a DB2 Certified Solutions Expert (Business Intelligence and Database Administration). You can reach him at paulz_ibm@msn.com.
Contributors : Paul C. Zikopoulos
Last modified 2005-04-12 06:21 AM